

Hosting a Gimkit game looks simple until students cannot join, questions break mid-game, or the class loses focus after five minutes.
A successful Gimkit host does more than press “Start Game.” The best hosts know how to choose the right game mode, manage student engagement, reduce setup problems, and use post-game reports to improve learning outcomes.
Whether you are hosting your first live Gimkit session or trying to improve classroom engagement, the right setup can make live games smoother, faster, and more effective for both teachers and students.
In this guide, you will learn 10 practical Gimkit hosting tips that help teachers run more engaging and organized classroom games from start to finish..
What Is a Gimkit Host?
A Gimkit host is usually a teacher who creates and manages a live Gimkit game in the classroom. The host is responsible for setting up the game, controlling the settings, and ensuring students have a smooth and engaging learning experience.
As the host, you control everything in the game, including:
- The questions students answer (called a Kit)
- The game mode students play
- Who is allowed to join the game
- How long the game session runs
- What happens during and after the game
Think of yourself as the game designer and facilitator. Students are the players, and your role is to create a learning environment where gameplay and education work together effectively.
Now let’s explore the 10 practical tips that will help you become a more confident and effective Gimkit host.
10 Gimkit Host Tips for Better Live Games
Running a successful live Gimkit game requires more than good questions. The right hosting strategy can improve classroom engagement, reduce technical issues, and help students stay focused throughout the session.
The following Gimkit host tips are based on practical classroom use and can help teachers create smoother, faster, and more interactive live games.
Tip 1: Always Test Your Kit Before You Go Live
This is the number one mistake new Gimkit hosts make, they build a kit, press “Host,” and find a typo in question 3 in front of 25 students.
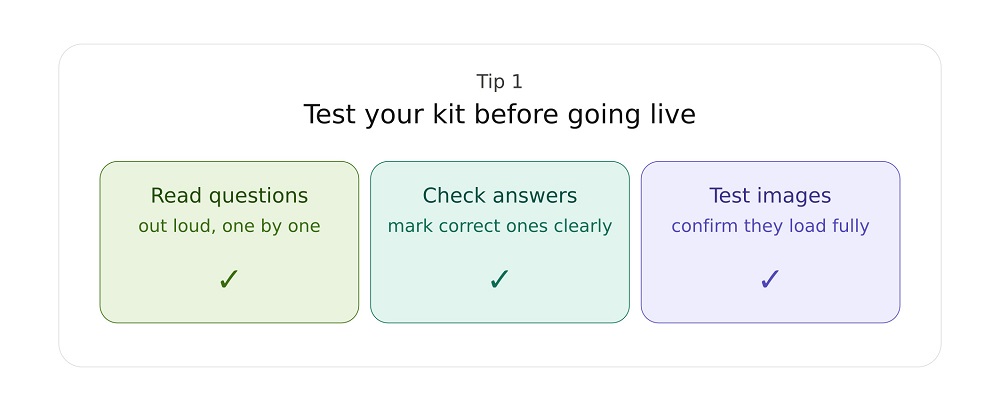
Before every game, do this:
- Open your kit and click “Play Solo” or “Preview”
- Read every question out loud
- Make sure every correct answer is actually marked correct
- Check that images load properly if you added any
Why this matters: A kit with wrong answers confuses students and kills the energy in the room. One quick test run takes 5 minutes and saves your whole lesson.
Pro tip: Build your kit one day early. Sleep on it. Come back and check it fresh the next morning before class.
Tip 2: Pick the Right Game Mode for Your Goal
Gimkit has many game modes, and this is where a lot of hosts get stuck. They use the same mode every time, and students get bored.
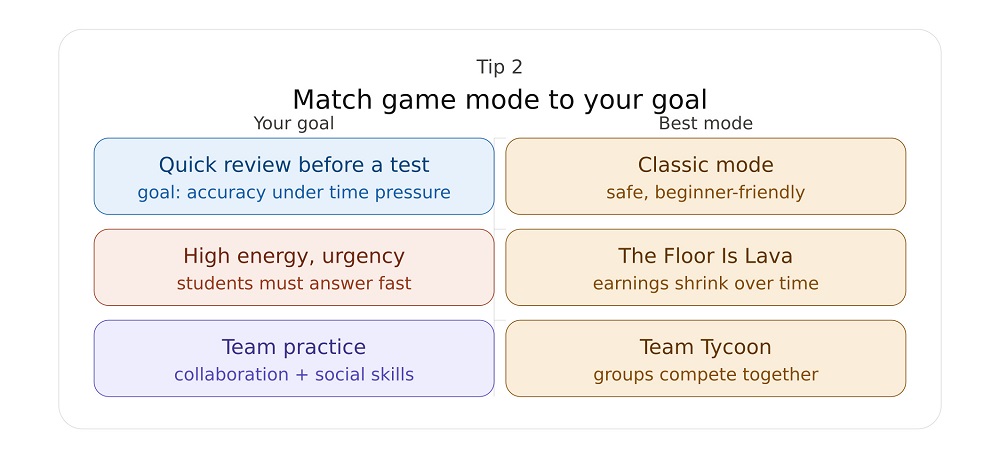
Here is a simple way to pick the right mode:
| Your Goal | Best Game Mode |
| Quick review before a test | Classic Mode |
| Team practice and collaboration | Team Tycoon |
| High energy and fun | The Floor Is Lava |
| Mystery and strategy | Trust No One |
| Exploring and adventure | Fishtopia or Blastball |
| Fast-paced competition | Tag: Domination |
Classic Mode is the safest choice for beginners. Students answer questions to earn in-game money and spend it on upgrades. It is simple, effective, and students understand it right away.
Once you are comfortable, try The Floor Is Lava, earnings drop over time, so students have to answer fast. This adds pressure in a fun way and works great for test review.
Trust No One is based on the Among Us style of social deduction. It works well for older students and creates a lot of conversation.
The rule is this: Match the game mode to your student’s energy level and your teaching goal. Do not pick a complicated mode just because it looks cool.
Tip 3: Use the Nickname Generator (This One Surprises Everyone)
Here is a tip that most Gimkit host guides never mention, the Nickname Generator.
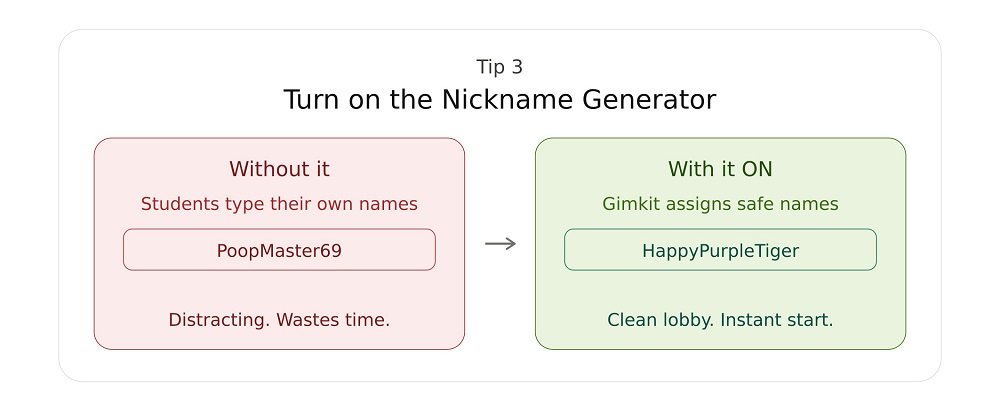
When students join a Gimkit game, they can type in any name they want. And sometimes, they type something silly, inappropriate, or distracting.
The Nickname Generator fixes this completely. When you turn it on, Gimkit automatically gives every student a random, safe nickname. Students cannot change it. No more funny names. No more lost time managing the lobby.
How to turn it on: Go to your game settings before hosting >> Find “Nickname Generator” >> Toggle it to ON.
This is especially useful for:
- Classes with younger students
- Remote sessions over Zoom or Google Meet
- Any time you want a smooth, professional start
Once you use it, you will wonder how you ever hosted without it.
Tip 4: Share the Join Code in Multiple Ways
You press “Host,” Gimkit gives you a 5-letter join code, and students go to gimkit.com/join to enter it.
Simple, right?
But here is what actually happens in class: some students do not see the code, some type it wrong, and a few are still figuring out how to spell the website. You waste 3–5 minutes getting everyone in.
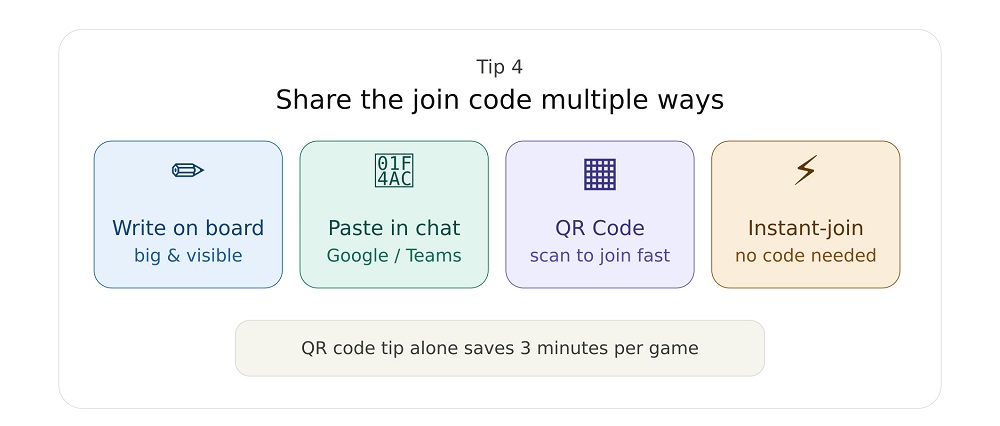
Fix this by sharing the code in at least 2 ways:
- Write it on the board in big letters
- Share it in your class chat (Google Classroom, Remind, Teams)
- Use the QR Code, hover over the game code on your host screen and a QR code pops up. Students can scan it with their phone camera and join instantly. No typing needed.
- Use Instant-join if your students have Gimkit accounts linked to your class. They skip the code and name entry entirely.
The QR code tip alone can save you 3 minutes every single game. That adds up fast over a school year.
Tip 5: Set Up Your Game Settings Before Students Arrive
Do not open game settings in front of a full lobby. You will feel rushed, students will start getting distracted, and you may click the wrong thing.
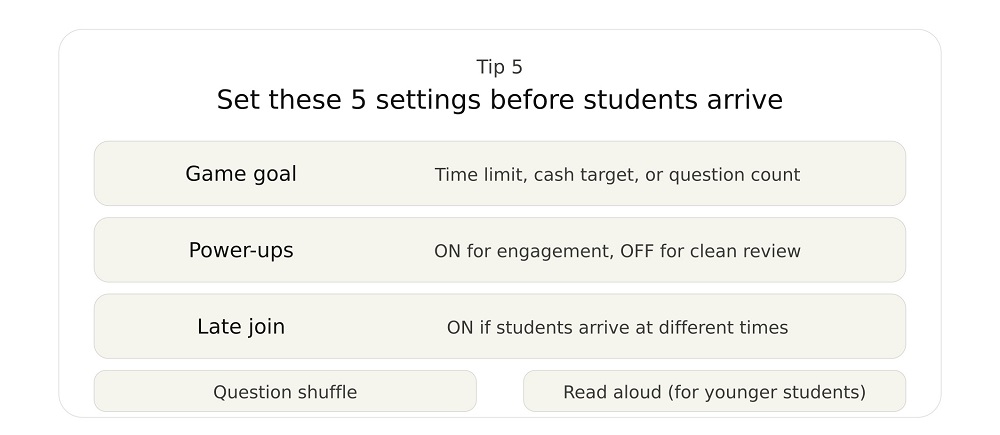
Set up these settings before you ever share the join code:
- Game Goal: Do you want to play until a time limit, until someone hits a cash target, or until all questions are answered? Choose what fits your class period.
- Power-ups: Turn these on for engagement, or turn them off if you want a clean, fast review without distractions.
- Late Join: Turn it ON if students come in at different times. Turn it OFF if you want a locked roster and no interruptions mid-game.
- Question Shuffle: Turn this on so students next to each other do not see the same question at the same time.
- Read Aloud (Read to Me): Turn this on for younger students or mixed-ability groups. Gimkit reads each question out loud on the student’s device.
Taking 2 minutes to check these settings before class means your game starts clean, and you look confident in front of your students.
Best Gimkit Settings for Teachers
The right Gimkit settings can significantly improve how smoothly your classroom game runs. Proper configuration helps reduce distractions, prevent technical issues, and keep students focused on learning.
Before starting a live game, teachers should adjust settings based on class size, student level, and lesson objectives.
Here are the most effective Gimkit settings for live classroom games:
| Setting | Recommended Use |
|---|---|
| Nickname Generator | Prevents inappropriate or distracting names and keeps the lobby professional |
| Question Shuffle | Reduces answer copying between students and improves fairness |
| Late Join | Allows students to enter the game without interrupting the session |
| Read to Me | Supports younger students and mixed-ability classrooms with audio assistance |
| Time Limit | Keeps the game structured and ensures lessons stay on schedule |
| Power-ups | Adds engagement and competition (can be turned off for focused review sessions) |
For most classrooms, enabling Nickname Generator, Question Shuffle, and Late Join creates a smoother and more controlled experience.
Teachers running exam reviews may also benefit from shorter time limits and reduced power-ups to keep the focus on accuracy rather than speed-based gameplay.
Tip 6: Use KitCollab to Get Students Involved Before the Game
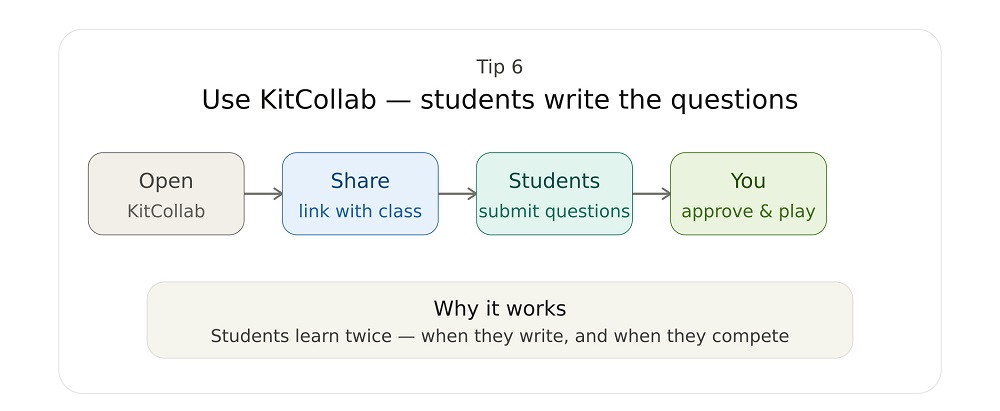
KitCollab is one of the most powerful but underused Gimkit features because it lets students actively contribute to the game before it even starts.
Instead of only answering questions, students can create and submit their own questions based on the lesson. You then review and approve them before the live game begins.
This approach improves engagement in three ways:
- Students revise the material while creating questions
- The class feels more involved in the game design
- You get ready-made practice questions without extra workload
For best results, assign KitCollab 1–2 days before the live game so students have enough time to think and contribute meaningful questions.
Tip 7: Watch the Host Dashboard During the Game
A common mistake many Gimkit hosts make is starting the game and then ignoring what happens during gameplay.
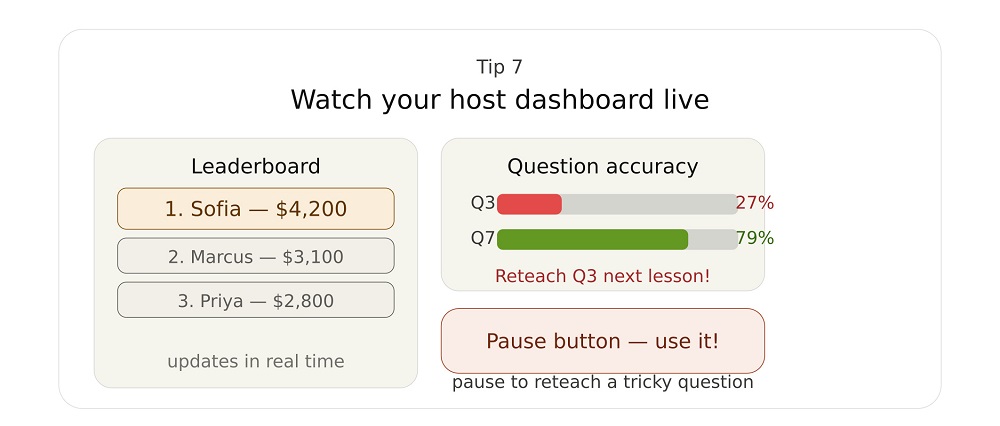
The host dashboard gives real-time insights into student performance, including who is struggling, who is ahead, and which questions are causing difficulty.
Pay attention to:
- Leaderboard changes to identify student engagement levels
- Frequently missed questions to spot weak concepts
- Silent or inactive players who may need support
If you notice most students struggling with a specific question, pause the game and briefly re-teach the concept. This turns the game into an active learning session instead of just competition.
Great Gimkit hosts don’t just run games, they adjust them in real time based on student performance.
Tip 8: Match the Difficulty of Questions to Your Students
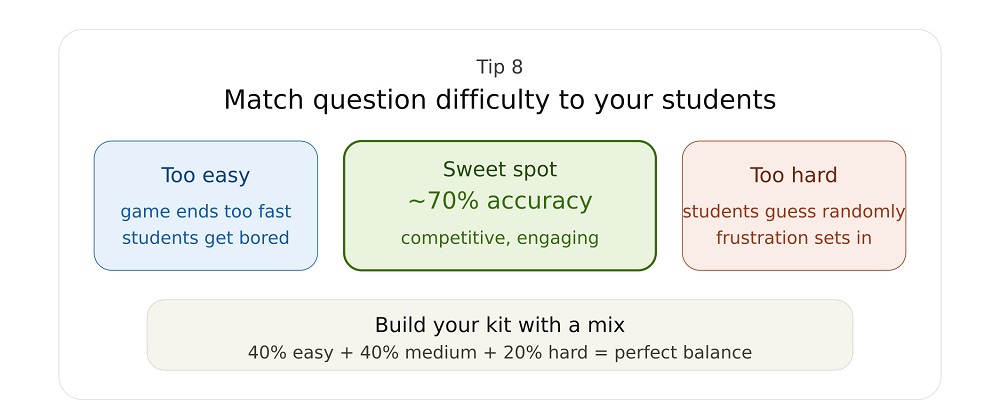
One of the biggest reasons Gimkit games fail to engage students is poorly balanced question difficulty.
If questions are too difficult, students start guessing randomly and lose motivation. If they are too easy, the game becomes boring and ends too quickly.
The goal is to maintain a balanced challenge where most students feel engaged but still need to think.
A good rule of thumb is:
- Around 60–75% of students should answer most questions correctly
- Mix easy, medium, and slightly challenging questions in every kit
- Avoid overly tricky or ambiguous questions that cause confusion
For younger students, keep questions simpler and reduce time pressure. For advanced learners, increase difficulty slightly and add more application-based questions.
A well-balanced kit keeps the game competitive, fair, and focused on learning rather than guessing.
Tip 9: Assign Homework Mode for Students Who Missed the Live Game
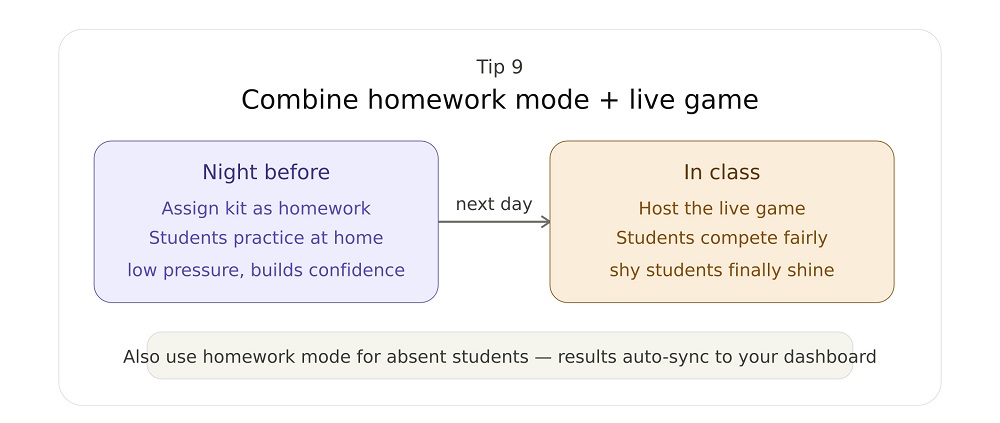
Gimkit is not only effective for live classroom games, it also works as a powerful homework and practice tool.
Homework Mode allows students to complete the kit on their own time before or after the live session. This helps reinforce learning without classroom pressure.
This feature is especially useful for:
- Students who missed the live game
- Pre-class preparation before a review session
- Extra practice for struggling learners
- Reinforcing concepts after a lesson
A strong strategy is to assign the same kit as homework before a live game. This ensures students already understand the basics, making the live session more competitive, engaging, and fair for everyone.
Teachers can also use homework results to identify weak areas before planning the next class activity.
Tip 10: Read the Post-Game Report Every Single Time
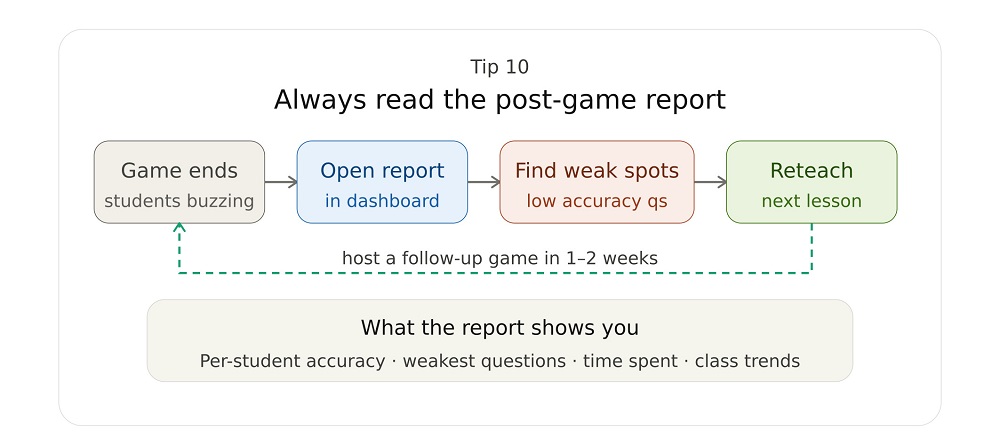
Many teachers end a Gimkit session by looking at the leaderboard and then moving on. However, the real learning value comes from analyzing the post-game reports.
These reports show detailed insights into student performance, including accuracy, question difficulty trends, and individual progress.
Instead of focusing only on who won, use the data to improve your teaching strategy.
Here’s how to use Gimkit reports effectively:
- Identify questions with the lowest accuracy and reteach those concepts
- Track individual student performance to provide extra support where needed
- Compare results across multiple games to measure improvement over time
- Adjust future kits based on recurring weak areas in student understanding
Teachers who consistently review reports turn Gimkit from a simple game into a data-driven learning tool that improves long-term student performance.
This step is what separates casual hosts from advanced, effective Gimkit educators.
Common Gimkit Hosting Mistakes
Before we wrap up, here are the most common mistakes, and fast fixes:
- Starting the game with too many students still joining Fix: Wait until 90% of students are in the lobby. Late joins mid-game interrupt the flow.
- Using the same game mode every time Fix: Rotate modes. Try a new one every 2 to 3 weeks. Students stay curious.
- Never checking the host dashboard during the game Fix: Keep it open on your screen. Glance at it every few minutes.
- Making kits too long Fix: 10 to 15 questions is enough for a standard class session. Quality beats quantity.
- Forgetting to review the post-game report Fix: Block 5 minutes after class to look at results. It makes your next lesson better.
- Not preparing for tech issues Fix: Always have a backup join link copied. Use Chrome for the best performance. Ask students to close extra browser tabs before joining.
How to Use Gimkit Reports to Improve Student Performance
Gimkit reports provide valuable insights that help teachers understand how students are performing during and after a game. Instead of only looking at scores, these reports allow you to analyze learning patterns and identify areas that need improvement.
By using report data effectively, teachers can turn every Gimkit session into a meaningful learning opportunity.
Here’s how to use Gimkit reports for better classroom results:
- Identify questions that most students answered incorrectly and revisit those topics in class
- Track individual student progress to understand who needs extra support
- Compare performance across multiple games to measure improvement over time
- Spot learning gaps and adjust future lesson plans accordingly
- Use accuracy data to improve question quality in future kits
Consistently reviewing Gimkit reports helps teachers move from simple game-based learning to a more data-driven teaching approach.
Over time, this improves student understanding, retention, and overall classroom performance.
Conclusion
Becoming an effective Gimkit host is not just about starting a game, it’s about how you prepare, manage, and learn from each session.
From choosing the right game mode and adjusting settings to monitoring student engagement and analyzing post-game reports, every step plays a role in creating a smoother and more impactful learning experience.
When used correctly, Gimkit becomes more than a quiz tool. It becomes a classroom engagement system that improves participation, motivation, and long-term understanding.
Start with a few of the tips in this guide, apply them in your next class, and gradually refine your approach. Over time, you will notice more focused students, better game flow, and stronger learning outcomes.
Great Gimkit hosts are not defined by how they start the game—but by how they improve it after every session.
FAQs (Frequently Asked Questions)
Q.1: What is a Gimkit host?
A Gimkit host is usually a teacher who creates and manages a live Gimkit game. The host controls the game mode, settings, questions, and overall flow of the session to ensure students have an engaging learning experience.
Q.2: Do students need an account to join a Gimkit game?
No, students do not need an account to join a live Gimkit game. They can simply enter the join code provided by the host. However, accounts are useful for tracking progress over time.
Q.3: What is the best Gimkit mode for beginners?
Classic Mode is the best option for beginners because it is simple, easy to understand, and works well for both practice and review sessions.
Q.4: How many questions should a Gimkit kit have?
A good Gimkit kit usually has 10 to 20 well-balanced questions. The focus should be on quality and clarity rather than quantity.
Q.5: Can Gimkit be used for homework or assignments?
Yes, Gimkit has a Homework Mode that allows teachers to assign kits for independent practice outside the classroom. It is useful for revision and supporting absent students.
Q.6: Why should teachers use Gimkit reports?
Gimkit reports help teachers analyze student performance, identify weak areas, and improve future lessons based on real data from gameplay.